Date
Wed Mar 25Let’s be honest, water damage is a homeowner’s worst nightmare. And often, the secret culprit is your failing gutter system. When gutters give up, water seeps into your roof, siding, and even your foundation. A timely gutter replacement is your best defense. This guide breaks down the entire gutter replacement process, step-by-step. We’ll cover the warning signs that it’s time to replace your gutters, how to choose the right materials, and what to expect for your budget. You’ll walk away ready to make a confident, informed decision for your home.
Key Takeaways
- Know the warning signs of failure: A quick visual inspection can reveal problems like cracks, rust, and sagging. Addressing these issues promptly protects your home’s siding and foundation from costly water damage.
- Match the materials to your goals: Your choice of gutter material impacts cost, durability, and maintenance. Seamless aluminum is a popular, high-value option, and adding gutter guards can save you time and prevent future clogs.
- Vet your contractor carefully: A proper installation is critical for performance and longevity. Always verify a contractor’s license and insurance, ask for an itemized quote, and check their local references to guarantee your project is in good hands.
Is It Time to Replace Your Gutters?
Your home’s gutters work hard, channeling thousands of gallons of rainwater away from your foundation, roof, and siding every year. Because they do their job quietly, it’s easy to forget about them until a problem pops up. But worn-out gutters can lead to serious issues like a leaky roof, water-damaged siding, and even a compromised foundation. So, how can you tell when it’s time for a replacement?
Most gutters have a lifespan of about 20 years, but this can vary depending on the material, your local climate, and how well they’ve been maintained. Instead of just going by age, it’s better to look for specific warning signs that signal your gutter system is failing. A quick walk around your property is often all you need to spot trouble. Catching these issues early can save you from more expensive and extensive repairs down the road. Think of it as a regular health checkup for your home’s exterior. Below are a few key indicators that your gutters are nearing the end of their service life and it’s time to consider an upgrade. Paying attention to these details will help you protect your investment and keep your home safe and dry.
Are Your Gutters Cracked, Rusted, or Peeling?
One of the most straightforward signs of gutter failure is visible damage. Take a close look at your gutter sections, especially at the seams where pieces connect. Small cracks might not seem like a big deal, but they can quickly worsen, allowing water to leak out and damage your fascia boards and siding. If you have metal gutters, check for any orange or reddish-brown spots, as rust will eat through the material and create weak points or holes. Peeling paint is another red flag. It often indicates that water is constantly present, either on the surface or underneath, which means the gutters are no longer properly protected and are starting to deteriorate from the inside out.
Is Water Damage or Mildew Appearing on Your Home?
Your gutters’ main job is to protect your home’s exterior, so if you see signs of water damage, the gutters are likely the culprit. Look for water stains, discoloration, or streaks of dirt running down your siding. This often means that water is overflowing, either because the gutters are clogged or because they are leaking from cracks or failed seams. If you notice mildew or mold growing on your exterior walls, especially near the foundation or under the eaves, it’s a clear sign that excess moisture is present. Properly functioning gutters prevent this, so these issues suggest it’s time for an inspection and potential replacement to protect your residential siding.
Are Your Gutters Sagging or Pulling Away?
Gutters should be securely fastened against your home and maintain a slight, even slope toward the downspouts. If you see them sagging in the middle or pulling away from the roofline, it’s a serious problem. This indicates that they are weighed down, likely by debris and standing water, and the fasteners that hold them in place are failing. Sagging gutters cannot channel water effectively, causing it to pool and overflow. More importantly, a gutter that is pulling away from the house is a safety hazard that could eventually fall and damage your residential roofing or anything below it, like windows or landscaping.
What Are Your Gutter Options?
When it’s time to replace your gutters, you’ll quickly discover that you have a few key decisions to make. Gutters aren’t a one-size-fits-all product; the right choice depends on your home’s architectural style, your budget, and the amount of rainfall we get here in the Puget Sound region. Understanding your options will help you select a system that not only looks great but also effectively protects your home from water damage. Let’s walk through the main styles, materials, and types of construction you’ll encounter.
Picking Your Gutter Style: K-Style, Half-Round, or Box
The style of your gutter contributes to your home’s curb appeal and its water-handling capacity. K-style gutters are the most popular choice for residential homes. They have a flat back for easy installation against the fascia and a decorative front edge that mimics crown molding. They are cost-effective, durable, and can hold more water than half-round gutters of the same width.
Half-round gutters offer a more traditional, semi-circular look that complements older or historic homes. When installed with the correct pitch, their smooth shape helps minimize standing water and debris buildup. For larger buildings, box gutters are the standard. These are oversized, rectangular troughs designed for high-capacity water management, making them ideal for commercial properties or homes with expansive rooflines.
Finding the Right Material: Aluminum, Vinyl, and Copper
The material you choose will determine your gutters’ durability, maintenance needs, and overall cost. Aluminum is the top choice for most modern homes. It’s lightweight, rust-proof, and comes in a wide variety of colors to match your trim or siding. It offers a fantastic balance of performance and value.
Vinyl gutters are an affordable, low-cost option that’s easy for homeowners to install themselves. However, they are less durable than metal alternatives and can become brittle over time, typically lasting about 10 years. For a premium look, copper is an excellent investment. It’s extremely durable and develops a beautiful patina over time, though it comes at a significantly higher price. These material choices can be coordinated with your home’s residential siding for a cohesive exterior design.
Seamless vs. Sectional Gutters: Which Is Right for You?
Finally, you’ll need to choose between seamless and sectional construction. Seamless gutters are custom-fabricated on-site from a single piece of metal to fit the exact dimensions of your roofline. Because there are no joints or seams along the straight runs, the potential for leaks is virtually eliminated. This makes them a durable, low-maintenance option that provides a clean, professional look.
Sectional gutters, on the other hand, are sold in pre-cut lengths and joined together with connectors. While they are easier to install for a DIY project, every seam is a potential weak point that can leak over time. These systems often require more maintenance to seal and secure the joints, making seamless gutters the preferred choice for a long-lasting, reliable residential roofing system.
Which Gutter Brands Can You Trust?
Choosing the right brand and material for your gutters can feel overwhelming, but it really comes down to balancing your budget with your long-term goals. Whether you’re looking for a top-of-the-line system that requires almost no upkeep or a budget-friendly option that gets the job done, there’s a perfect fit for your home. Let’s look at some of the top options across different price points.
The Best of the Best: Premium Gutter Systems
When you want a “set it and forget it” solution, premium gutter systems are the way to go. Brands like LeafGuard are known for their patented, one-piece designs that keep debris out while letting water flow freely. These systems often use heavier-gauge aluminum and come with extensive warranties, giving you peace of mind for decades. The main advantage is the integrated protection, which means you can say goodbye to annual gutter cleaning. While the initial investment is higher, the long-term value comes from their durability and the minimal maintenance they require. This makes them a fantastic choice for anyone who wants the highest level of performance and convenience.
Reliable and Affordable: Mid-Range Gutter Options
For a fantastic balance of performance and value, seamless aluminum gutters are the most popular choice for a reason. Unlike sectional gutters that come in pieces, seamless systems are custom-made on-site to fit your home’s exact dimensions. This single-piece construction drastically reduces the chance of leaks, which often start at the seams. Aluminum is also rust-proof, lightweight, and available in a wide array of colors to match your home’s exterior. These systems offer a long lifespan and reliable performance without the premium price tag, making them a solid, dependable investment for most homeowners.
Quality on a Budget: The Best Value Gutters
If you’re working with a tighter budget, you still have good, reliable options. Vinyl gutter systems are the most affordable on the market and are lightweight enough for a confident DIYer to install. While they don’t last as long as metal systems, they are rust-proof and won’t dent. Another cost-effective choice is sectional aluminum gutters, which you can find at most home improvement stores. These systems come in 10-foot lengths that you piece together. The main trade-off with any sectional system is the potential for leaks at the seams over time. These gutter materials are a practical solution for keeping costs down upfront.
What’s the Cost of Gutter Replacement?
Figuring out the budget for new gutters is a top priority for most homeowners. While national averages suggest a gutter installation can range from about $2,600 to $4,700, the final price tag depends heavily on your specific home and choices. Think of it less as a simple expense and more as a crucial investment in protecting your home’s foundation, siding, and landscaping from water damage, especially here in the rainy Puget Sound.
The total cost is a mix of several key elements. The size of your home and the complexity of its roofline play a big role, as do the materials you choose and the local labor rates. Removing and disposing of your old gutters can also add to the project’s cost. Because every home is unique, the best way to get an accurate number is to get a detailed quote. A professional assessment will give you a clear picture of what to expect and ensure your new gutter system is perfectly suited to protect your property for years to come.
What Factors Influence the Price?
Several key factors determine the final price of your gutter replacement. The biggest drivers are your home’s size and the materials you select. A larger, two-story house with a complex roofline will naturally cost more than a small, single-story home because it requires more materials and labor.
Here are the main components that affect your quote:
- Linear Feet: The total length of gutters needed for your home.
- Gutter Material: The type of material you choose, from affordable vinyl to premium copper.
- Labor: The cost to have a professional team remove your old system and install the new one.
- Add-ons: Extras like downspouts, splash blocks, and gutter guards will also be part of the final cost.
Understanding these cost factors helps you see exactly where your money is going.
A Cost Breakdown by Gutter Material and Style
The material you choose for your gutters is one of the most significant decisions affecting both cost and longevity. Aluminum is the most popular choice for modern homes; it’s lightweight, rust-proof, and offers a great balance of performance and affordability. Vinyl is another budget-friendly option, though it may not be as durable in climates with extreme temperature shifts.
For a high-end look, copper is an excellent choice. It’s incredibly durable and develops a beautiful patina over time, but it can cost more than twice as much as an aluminum system. When it comes to style, K-style gutters are the standard for most residential homes. Their flat backs and decorative fronts make them both effective and easy to install. You can explore different gutter designs to find the perfect fit for your home’s architecture.
How Can You Pay for Your New Gutters?
A full gutter replacement is a significant home improvement project, and you don’t have to pay for it all at once. Many homeowners find that financing helps make the cost more manageable by breaking it down into predictable monthly payments. This approach allows you to get the necessary work done now to protect your home, rather than waiting and risking more expensive water damage repairs down the line.
Most reputable contractors offer flexible payment plans to fit different budgets. When you get a quote, don’t hesitate to ask about the available financing options. Many companies partner with lenders to offer plans with competitive interest rates and simple application processes. This can make a high-quality, long-lasting gutter system an affordable reality for your home.
The Anatomy of a Professional Gutter Installation
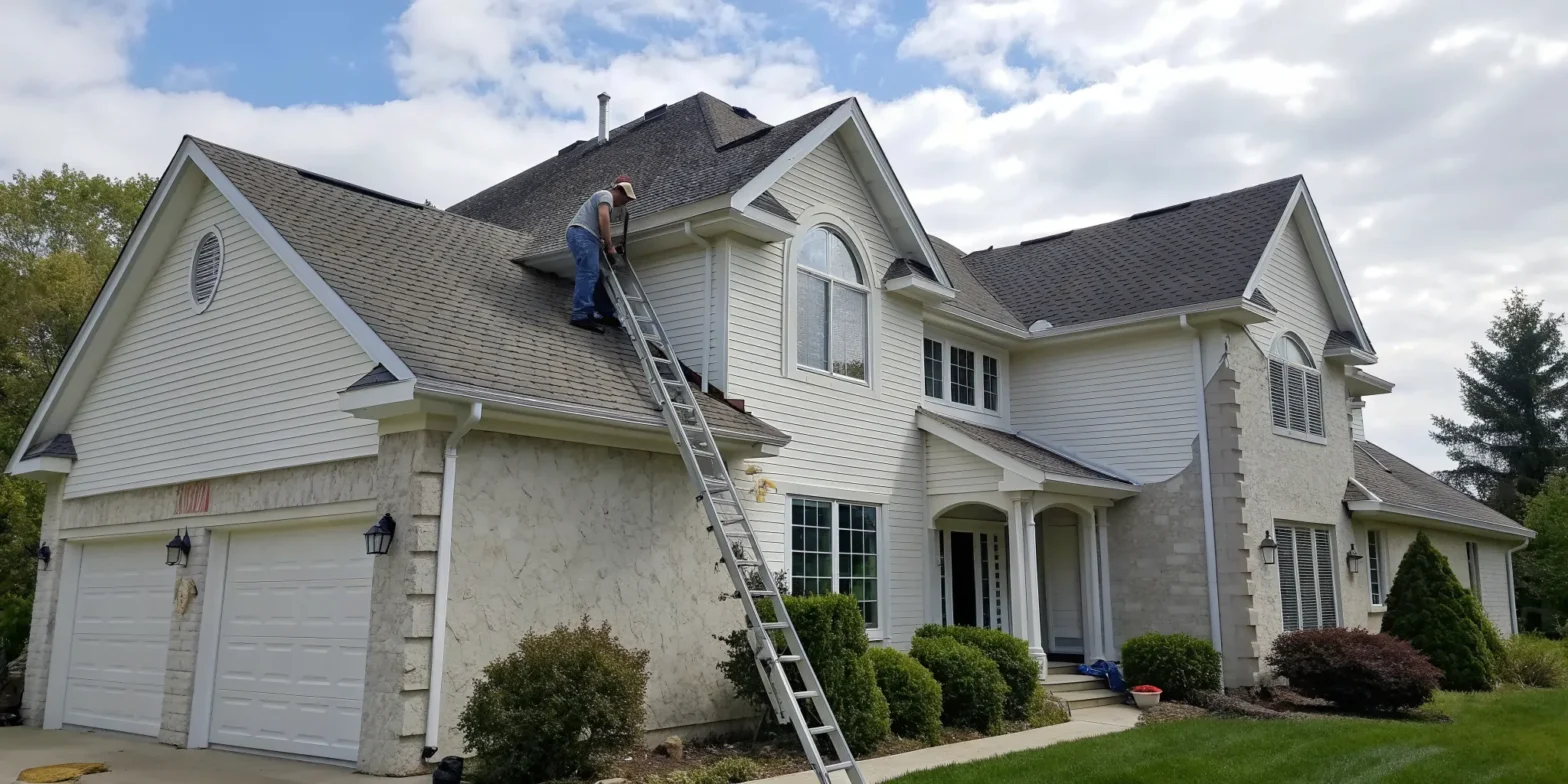
A successful gutter system is about more than just high-quality materials; it’s about precision installation. When professionals install gutters, they follow a specific set of technical standards designed to ensure every drop of rainwater is managed effectively. From calculating the perfect slope to securing hangers at precise intervals, each step is critical for creating a system that protects your home for the long haul. This attention to detail is what separates a functional, long-lasting gutter system from one that fails prematurely. Understanding these key elements will help you appreciate the craftsmanship that goes into a professional job and know what to look for in a quality installation.
Getting the Slope Just Right
The most critical element of a functional gutter system is the slope, or pitch. Gutters need to be angled slightly so that gravity can do its job and guide water toward the downspouts. If they’re installed perfectly level, water will pool and stagnate, creating a breeding ground for mosquitoes and adding excess weight that can cause sagging. The standard for proper drainage is a drop of about 1/4 inch for every 10 feet of gutter. A professional installer uses a chalk line to snap a precise guideline along the fascia board, ensuring this gentle, consistent slope is maintained across the entire length of the roofline for optimal water flow.
Handling Long Gutter Runs
For homes with long, uninterrupted rooflines, a single continuous slope isn’t always practical or effective. On any gutter run that extends beyond 40 feet, a professional will adjust the layout to ensure proper drainage. Instead of sloping the entire length from one end to the other, they will pitch the gutter down from the center, directing water toward downspouts placed at each end. This technique, known as creating a high point in the middle, prevents water from gaining too much momentum and overflowing on long runs. It’s a simple but crucial adjustment that ensures even the largest roofs are protected from concentrated water flow.
Proper Hanger and Downspout Placement
Even with the perfect slope, a gutter system will fail without adequate support and drainage. Gutter hangers are the unsung heroes of the system, bearing the weight of the gutters and the water flowing through them. Downspouts provide the exit route, channeling all that collected water safely to the ground. The placement and spacing of these components are not arbitrary; they are calculated to handle the specific water load from your roof. Professionals determine the optimal number and location of each to create a balanced system that can withstand heavy downpours without sagging, overflowing, or pulling away from your home.
How Far Apart Should Hangers Be?
To prevent gutters from sagging under the weight of heavy rain, snow, or debris, hangers must be installed at regular intervals. The industry standard is to place a hanger every 18 to 24 inches along the fascia board. This spacing provides robust support and distributes the weight evenly, ensuring the gutter remains straight and secure against the house. For a clean, modern aesthetic, most professionals use hidden hangers, which clip inside the gutter and are invisible from the ground. This method provides superior strength without disrupting the home’s exterior lines, offering both durability and curb appeal.
How Many Downspouts Do You Need?
The number of downspouts your home needs depends on the size of your roof and the length of your gutter runs. A general rule of thumb is to install one downspout for approximately every 30 to 40 feet of gutter. This ensures that water can exit the system quickly without overwhelming any single section. A professional will also consider your roof’s pitch and surface area to determine if additional downspouts are needed to handle high-volume runoff during heavy storms. Proper placement is key to preventing overflows that could otherwise damage your siding and landscaping.
Directing Water Away from Your Foundation
The final, and perhaps most important, step of any gutter installation is ensuring that water is directed far away from your home’s foundation. A downspout that terminates right next to the house will dump all the collected rainwater into the soil, where it can cause erosion, basement flooding, and costly foundation damage over time. Professionals solve this by attaching elbows and extensions to the bottom of the downspouts, guiding water at least three to four feet away from the structure. This simple measure is a critical defense in protecting the structural integrity of your home and preventing moisture-related problems.
DIY Gutter Replacement: What You Need to Know
For homeowners who enjoy rolling up their sleeves, a DIY gutter replacement can seem like a tempting way to save on labor costs. With sectional gutters readily available at home improvement stores, the project is certainly accessible. However, installing gutters correctly requires more than just a few basic tools and a free weekend. It involves working at heights, precise measurements, and an understanding of how water management systems work. Before you decide to tackle this project yourself, it’s important to have a clear and realistic picture of the skills, tools, and safety precautions involved to ensure the job is done right.
Is This a Good DIY Project for You?
Before committing to a DIY gutter installation, it’s wise to honestly assess your skills and comfort level. This project is generally considered to be of intermediate difficulty. It requires you to work comfortably and safely on a ladder, sometimes for several hours at a time. You’ll also need to be precise with your measurements and cuts to ensure the gutter sections fit together snugly and maintain the correct slope for proper drainage. If you have experience with similar home improvement projects and are confident in your ability to handle these tasks, it could be a rewarding project. If not, a professional installation may be the safer and more effective option.
Required Skill Level and Safety Precautions
Safety should always be your top priority when working on a ladder. Always use a sturdy, stable ladder, and consider a ladder stabilizer for added security against the roofline. Never overreach; instead, take the time to move the ladder to a new position. You’ll also need basic carpentry skills, including the ability to measure accurately, snap a straight chalk line, and use a power drill. Protective gear is a must—always wear safety glasses to shield your eyes from debris and heavy-duty gloves to protect your hands from sharp metal edges. Following these ladder safety tips is non-negotiable.
Estimated Time, Cost, and Local Rules
For a small, single-story home, you can expect a DIY gutter installation to take anywhere from four to eight hours. However, for larger or more complex rooflines, it could easily become a multi-day project. While you will save on labor costs, be sure to budget for all the necessary materials, including the gutter sections, connectors, hangers, and sealant. It’s also a good idea to check with your local municipality, as some areas may have specific building codes or requirements related to drainage and water runoff that you will need to follow to ensure your project is compliant.
Essential Tools and Materials for the Job
A successful DIY gutter installation depends on having the right equipment on hand before you start. Gathering all your tools and materials ahead of time will make the process much smoother and prevent multiple trips to the hardware store. You’ll need a combination of standard hand tools, a few specialty items for working with gutters, and all the specific components that make up the gutter system itself. Having a complete checklist ensures you won’t find yourself stuck on the ladder missing a crucial part. Below is a comprehensive breakdown of the tools and materials required for the job.
The Gutter Installer’s Toolkit
To properly install sectional gutters, you will need more than just a hammer and nails. Your toolkit should include a sturdy extension ladder with a stabilizer, a tape measure, and a chalk line for marking the slope. A cordless drill with a 1/4-inch hex driver is essential for fastening hangers and downspout straps. For cutting the gutter sections to size, you’ll need a pair of tin snips or a hacksaw. Finally, you’ll need a high-quality, gutter-rated sealant to waterproof all the seams and end caps to prevent leaks. Having these specific tools will make the installation process much more efficient.
A Complete List of Materials and Specialty Parts
Beyond the gutter sections themselves, you’ll need a variety of specialty parts to assemble the system. This includes end caps to close off the runs, connectors to join sections together, and corner pieces (or miters) for navigating your roofline. For drainage, you will need downspout outlets, downspouts, elbows to direct the flow, and straps to secure the downspouts to your home. You will also need hangers or brackets to attach the gutters to the fascia and rust-resistant screws to secure everything in place. Making a detailed shopping list before you begin is a great way to stay organized.
How to Choose the Right Gutter Contractor
Selecting the right gutters for your home is a big step, but finding the right contractor to install them is just as crucial. The best materials won’t perform well if they aren’t installed correctly. A great contractor ensures your gutter system functions perfectly, protecting your home from water damage for years to come.
Making the right choice comes down to doing a little homework. You’ll want to confirm their qualifications, ask thoughtful questions, and keep an eye out for any warning signs. Think of it as hiring a long-term partner for your home’s exterior health. A trustworthy company will be transparent and professional, making the entire process feel straightforward and secure. Taking these steps will help you find a reliable expert who can handle everything from residential siding to complex gutter installations with skill and care.
Always Check for Credentials and Licensing
Before you get too far into the conversation, make sure any contractor you’re considering is properly licensed and insured. This is non-negotiable. Licensing proves they meet state and local requirements to perform the work, while insurance protects you from any liability if an accident happens on your property. A reputable company will have no problem providing you with proof of both. Look for a contractor with a strong, established presence in the Puget Sound area and a solid track record. A long history of quality work is often the best indicator of a company you can trust to protect your home.
Essential Questions to Ask Your Gutter Contractor
Once you’ve confirmed a contractor’s credentials, it’s time to dig a little deeper. Treat this step like a job interview where you’re the one in charge. Asking the right questions can reveal a lot about their expertise, work ethic, and reliability.
Here are a few key questions to get you started:
- How long have you been installing gutters in this area?
- Can you provide a few local references or a portfolio of your work?
- What warranties do you offer on materials and your installation?
- Will you provide a detailed, itemized estimate in writing?
- Who will be on-site, and are they employees or subcontractors?
A professional contractor will welcome these questions and provide clear, confident answers, whether they’re working on a home or a commercial siding project.
Contractor Red Flags to Watch For
Just as important as knowing what to look for is knowing what to avoid. Some warning signs should immediately tell you to walk away. Be cautious of any contractor who uses high-pressure sales tactics or pushes you to sign a contract on the spot. Another major red flag is a vague estimate that doesn’t break down the costs of labor and materials. You can even use a roofing cost calculator to get a baseline idea of what fair pricing looks like. Also, be wary of anyone who asks for a large cash deposit upfront or lacks a permanent business address. If a contractor has a string of negative online reviews or can’t provide references, it’s best to continue your search.
What to Expect During the Gutter Replacement Process
Once you’ve chosen your materials and selected a trusted contractor, you can look forward to installation day. Knowing what the process involves can help you feel prepared and confident as your home gets its upgrade. A professional crew will handle everything efficiently, but it’s always helpful to understand the key stages of the day. From the initial measurements to the final cleanup, a well-organized team ensures the project runs smoothly and leaves you with a gutter system that’s built to last.
The entire process is designed to be as undisruptive as possible. Your contractor should communicate the plan clearly, so you’re never left guessing what’s next. Think of it as a coordinated effort to protect your home, starting with a careful plan and ending with a quality installation you can rely on for years to come.
Step 1: The On-Site Assessment and Measurements
The first thing the installation crew will do upon arrival is a pre-work walk-around. They’ll confirm the scope of the project with you and review the plan one last time before getting started. This is the perfect opportunity to ask any last-minute questions. Next, they will take precise measurements of your roofline. This step is critical for ensuring your new gutters are a perfect fit, especially if you’ve chosen a seamless system that’s custom-formed on-site. A professional team never relies on old measurements; they verify everything on the day of installation to guarantee accuracy and prevent any issues down the line.
Inspecting and Repairing the Fascia Board
Once the old gutters are off, the crew gets a clear view of the fascia board—the long, straight board running along the lower edge of your roof where the gutters are mounted. Think of it as the foundation for your entire gutter system. Before any new gutters go up, the crew will carefully inspect this board for any signs of wood rot or water damage. This step is crucial because attaching brand-new gutters to a weak or rotting fascia is a recipe for failure. It can lead to the very same sagging and pulling away you were trying to fix. If the team finds any soft spots or damage, they will need to repair or replace the affected sections to ensure the new system has a solid, secure base. This ensures your investment is protected and your gutters will stay firmly in place for years.
Step 2: Old Gutter Removal and New Installation
After the assessment, the team will carefully remove your old gutters. They’ll work methodically to detach the sections without damaging your roof, fascia boards, or residential siding. Once the old system is gone, they’ll install the new gutters, making sure each section is pitched correctly to guide water toward the downspouts. They will securely fasten the gutters to your home for maximum stability. For most homes, the entire removal and installation process is completed within a single day. The crew will also ensure all old materials and debris are cleaned up and hauled away, leaving your property looking neat and tidy.
Pre-Assembling Sections on the Ground
A professional installation team works efficiently by doing as much prep work on the ground as possible. Before anything goes up on the house, they cut the gutter sections to the precise lengths needed for each run. They’ll also attach components like end caps and corners first, ensuring a perfect fit. This methodical approach is safer and leads to a cleaner, more secure installation. For sectional systems, they make sure to overlap the joints in the direction the water will flow, which is a simple but critical detail that helps prevent leaks from the very start. This ground-level assembly minimizes time spent on ladders and ensures every connection is solid before it’s lifted into place.
Marking the Slope and Attaching Hangers
Proper water flow doesn’t happen by accident; it’s all about the slope. The installation crew will use a chalk line to mark a carefully calculated slope along your fascia boards. The standard is a drop of about a quarter-inch for every 10 feet of gutter, which is just enough to let gravity do its work without being noticeable from the ground. Once the line is set, they’ll attach the hangers that support the gutter. These are typically spaced every 18 to 24 inches to provide robust support and prevent sagging. This meticulous process ensures that rainwater moves swiftly toward the downspouts instead of pooling and overflowing.
Sealing Joints for a Watertight System
For sectional gutter systems, creating a watertight seal at every joint is the most critical step. Even the smallest gap can turn into a persistent leak that damages your fascia and siding. Professionals apply a thick bead of high-quality gutter sealant to all seams, corners, and end caps. After applying the sealant, they’ll often use rivets or gutter screws to secure the connections, creating a strong mechanical bond that holds up against the elements. This two-pronged approach ensures that every potential weak point is fortified, giving you a durable, leak-resistant system that effectively protects your home.
Advanced Installation Techniques
Experienced installers know that certain situations require more than a standard approach. For instance, on homes with very long rooflines (over 40 feet), they won’t slope the gutter from one end to the other. Instead, they’ll pitch it down from the middle toward downspouts at both ends to manage the water volume effectively. This is also where the benefits of seamless gutters truly shine. By custom-fabricating a single piece of metal on-site, professionals eliminate the seams that cause leaks in sectional systems. This advanced technique provides a cleaner look and superior, long-lasting performance for your home’s exterior.
Step 3: The Final Walk-Through and Inspection
Before the crew packs up, a team lead will conduct a final walk-through with you. This is your chance to inspect the finished work up close. You’ll be able to check that the gutters are securely attached, the seams are sealed, and the downspouts are positioned correctly to direct water away from your foundation. A reputable contractor will want to ensure you are completely satisfied with the job. This final inspection provides peace of mind and confirms that your investment is sound, protecting your home with a high-quality, professionally installed gutter system.
Testing the System for Leaks and Proper Flow
The final step in a professional installation is a water test. Before the job is considered complete, your contractor should run water through the new gutters with a garden hose. This simple but crucial test simulates rainfall and confirms that the system is working exactly as it should. By introducing water at the highest point of a gutter run, they can watch its path and ensure everything is functioning correctly. It’s the ultimate quality check that proves the installation was a success and gives you confidence that your home is protected from the elements.
During this test, you’ll want to see a smooth, uninterrupted flow of water toward the downspouts. There should be no pooling or standing water, as this would indicate an incorrect slope. It’s also the perfect time to find and fix any leaks at the corners, end caps, and downspout connections. A professional installer will meticulously check these vulnerable points to ensure every seal is perfect. Catching and fixing a small drip at this stage is simple and ensures your new system is completely watertight and ready to protect your home from the next downpour.
Should You Add Gutter Guards?
When you’re replacing your gutters, you have the perfect opportunity to consider an upgrade: gutter guards. Think of them as a protective shield for your new gutter system. Their main job is to keep leaves, pine needles, and other debris out while letting rainwater flow freely. This simple addition can save you a lot of time and hassle down the road, drastically cutting down on the need for risky ladder climbs to clean out clogs. For many homeowners, this is one of the most valuable additions they can make to their home’s exterior.
While adding gutter guards does increase the initial investment in your gutter project, it’s a decision that pays off in the long run. By preventing blockages, you’re not just avoiding the chore of cleaning; you’re actively protecting your home’s foundation, siding, and roof from potential water damage. It’s a smart move for any homeowner in the Pacific Northwest, where falling leaves and needles are a year-round reality. Before you decide, it’s helpful to understand the different types of protection systems available and the specific benefits they offer. This will help you make an informed choice that fits your home and your budget.
What Are Gutter Protection Systems?
Gutter guards, also known as gutter protection systems, are essentially filters fitted over your gutters. They are designed to block debris while allowing water to pass through into the downspouts. There are several styles to choose from, and the right one for you often depends on the types of trees around your property. Common options include mesh screens, which have tiny holes to block even small particles like shingle grit, and perforated covers that handle larger leaves and twigs. There are also solid or reverse-curve guards that guide water into the gutter while encouraging debris to slide right off the edge. Each type of gutter guard offers a different level of protection and maintenance.
Are Gutter Guards Worth the Investment?
The most immediate benefit of installing gutter guards is the dramatic reduction in maintenance. You can say goodbye to spending your weekends on a ladder scooping out muck. This convenience also comes with a major safety benefit. Beyond that, gutter guards provide incredible long-term value by preventing the clogs that cause water to overflow. This overflow can damage your siding, erode your landscaping, and even compromise your home’s foundation. By keeping your gutters clear, guards also prevent standing water that can lead to rust and corrosion, helping your new gutter system last much longer. It’s an upfront investment that protects your entire home and saves you money on future repairs.
How to Care for Your New Gutters
Your new gutters are a major investment in protecting your home, so a little upkeep goes a long way. Proper care ensures they function correctly for years, directing water away from your foundation, siding, and landscaping. By staying on top of a few simple tasks, you can prevent clogs, water damage, and costly repairs down the road. Think of it as routine maintenance that keeps your entire home safe and dry, especially during those rainy Puget Sound seasons.
Setting Up a Simple Cleaning and Inspection Schedule
The easiest way to maintain your gutters is to set a consistent schedule. Plan to inspect and clean them at least twice a year, once in the spring and again in the fall after the leaves have dropped. It’s also a good idea to take a quick look after any major storms to check for immediate blockages. During your inspection, clear out leaves, twigs, and any other debris that could cause a clog. While you’re up there, check for any loose fasteners, signs of sagging, or small leaks at the seams. Catching these minor issues early prevents them from turning into bigger problems.
How to Prep Your Gutters for Every Season
Seasonal prep is key to keeping your gutters in top shape. In the fall, the main job is removing all the fallen leaves to prevent clogs that can lead to ice dams in the winter. In the spring, you’ll want to clear out any debris that accumulated over the winter and check for damage from ice or snow. Properly functioning gutters are your home’s first line of defense against water intrusion into your basement or crawl space, which can cause serious issues like mold and structural damage. A little seasonal attention keeps everything flowing smoothly and protects your home’s integrity.
When to Call a Professional for Gutter Maintenance
While routine cleaning is often a DIY job, some situations require professional help. If you notice your gutters are pulling away from the house, have persistent leaks even after cleaning, or show signs of rust and corrosion, it’s time to call for an expert opinion. Don’t hesitate to reach out if you’re uncomfortable on a ladder or if the job feels too big to handle. A professional can safely address any repairs, ensure your system is properly aligned, and give you peace of mind that your home is protected from the elements.
Related Articles
Frequently Asked Questions
How long should my gutters last, and does the Pacific Northwest climate affect that? Most aluminum gutters have a lifespan of about 20 years, while copper can last for 50 years or more. Here in the Pacific Northwest, our constant rain and damp conditions mean gutters work overtime. The persistent moisture can accelerate rust in steel gutters and contribute to debris buildup from our lush trees, which can weigh down any system. Because of this, regular maintenance is key to helping your gutters reach their full expected lifespan.
Is it better to repair a small leak or just replace the whole system? A single, small leak in an otherwise healthy gutter system can often be repaired effectively. However, if you’re seeing multiple leaks, widespread rust, or sagging sections, these are usually signs that the entire system is failing. A full replacement is often a better long-term investment than patching up a system that is nearing the end of its life, as it prevents you from having to pay for continuous small repairs.
Are seamless gutters really that much better than the ones I can buy at a hardware store? Yes, for most homes, they are a significantly better choice. The sectional gutters sold at hardware stores have joints every 10 feet or so, and every one of those seams is a potential point of failure where leaks can develop. Seamless gutters are custom-made from one continuous piece to fit your home perfectly, which nearly eliminates the risk of leaks along the straight runs and provides a much cleaner, more professional look.
Do gutter guards completely eliminate the need for cleaning? Gutter guards drastically reduce the amount of cleaning you’ll need to do, but no system is entirely maintenance-free. They are excellent at blocking large leaves and twigs, but over time, smaller particles like shingle grit or pine needles can sometimes accumulate. You may still need to occasionally rinse them off or clear small bits of debris, but you can say goodbye to the difficult and messy task of scooping out handfuls of muck every season.
What’s the most important thing to look for when getting a quote from a contractor? Beyond the final price, look for a detailed, itemized quote that clearly breaks down the costs for materials, labor, and any extras like gutter guards or old gutter disposal. A transparent quote shows that the contractor is professional and isn’t hiding any fees. This level of detail also allows you to accurately compare different bids and understand exactly what you are paying for.