Date
Fri May 15There’s a certain craft to installing a wood shingle roof, and the result is a classic look you can’t get from synthetic materials. Each shingle has its own unique grain and color. When you lay them correctly, they create a stunning, textured surface. But getting it right is about more than just looks. A proper wood roof installation ensures durability and a long life. This guide breaks down exactly how to install wood shingles using the essential techniques of the pros. We’ll help you create a beautiful, long-lasting roof that showcases true quality.
Key Takeaways
- Preparation is everything: Your roof’s success depends on what happens before installation, including a solid roof deck, proper underlayment, and a system for ventilation to handle moisture.
- Details define durability: Proper installation requires precision, so focus on key techniques like leaving expansion gaps between shingles, staggering joints from row to row, and using the correct nails to prevent future issues.
- Protect your investment for the long haul: A wood roof requires consistent care, such as routine inspections and gentle cleaning, to last. For a project this complex, hiring a professional provides the best guarantee for a durable, worry-free result.
What Are Wood Shingles?
If you love the idea of giving your home a classic, natural look, wood shingles are a fantastic option to consider. Simply put, wood shingles are thin, tapered pieces of wood, typically cut from durable trees, used to cover roofs and even walls. They offer a timeless beauty that blends seamlessly with natural surroundings while also providing excellent insulation. Before you jump into a project, it’s helpful to understand the different types of wood coverings available and which one is the right fit for your home and climate.
Shingles vs. Shakes: What’s the Difference?
You’ll often hear the terms “shingles” and “shakes” used together, but they aren’t quite the same thing. The main difference comes down to how they’re made. Wood shingles are sawn smooth on both sides, giving them a crisp, uniform appearance that creates a very clean and tailored look on a roof. On the other hand, wood shakes are split from a log, which results in a more rugged, textured surface. This gives shakes a rustic, dimensional character. While both are beautiful choices for residential roofing, your decision will likely come down to the specific style you’re hoping to achieve for your home.
Choosing Your Wood: Cedar, Pine, and More
When it comes to wood shingles, cedar is the star of the show. It’s incredibly popular for a reason: cedar is naturally resistant to decay and insects, making it a durable, long-lasting choice. While installing cedar can be more labor-intensive, the payoff is a beautiful roof that stands the test of time. Of course, cedar isn’t your only choice. Other woods like redwood and specially treated pine are also available. These options can vary in cost, appearance, and the level of maintenance they require. Exploring all the wood options helps you find the perfect balance between your budget and the aesthetic you want for your home’s exterior.
Matching Your Wood Shingles to Your Climate
Here in the Puget Sound, we know a thing or two about rain. That’s why choosing a roofing material that can handle moisture is so important. Your local climate plays a huge role in determining the best type of wood for your shingles. For areas with high humidity and frequent rain, like ours, cedar is an excellent choice because of its natural resistance to moisture and rot. This quality helps prevent the growth of moss and mildew, keeping your roof healthy for longer. Making a climate-smart choice ensures your roofing investment is a lasting one, whether it’s for your home or a commercial property.
Individual Shingles vs. Shingle Panels
When you’re planning your wood shingle roof, one of the first big choices you’ll face is whether to go with individual shingles or larger shingle panels. This decision really sets the stage for the whole project, affecting the installation time, the final look, and the overall cost. Both paths lead to a beautiful wood roof, but they take different routes to get there. Let’s break down the pros and cons of each so you can feel confident in your choice for your home.
Installing individual shingles is the classic, artisan approach. Each shingle is laid and nailed one by one, which gives a professional installer total control for a truly custom fit. This meticulous method allows them to perfectly align the shingle rows with your home’s unique features, like the tops of windows or the line of your eaves, creating a polished, high-end finish. The trade-off, of course, is time and labor. As the experts at Fine Homebuilding point out, this detailed work requires more skill and patience, making it a more intensive process.
Shingle panels, on the other hand, are all about efficiency. These are pre-assembled sections with shingles already attached to a backing, which allows them to be installed much faster. This can be a great way to reduce labor costs and get the job done more quickly. The main drawback is a loss of flexibility. Since the shingles are fixed on the panel, you can’t adjust the height of each course. This might mean the rows don’t line up perfectly with your windows or other architectural lines, which is a small detail that can make a big difference in the final look.
So, how do you choose? It really comes down to your priorities. If you’re aiming for that perfect, handcrafted appearance and have room in the budget for detailed labor, individual shingles offer an unmatched custom look. If your main goals are speed and cost-effectiveness, panels are a fantastic, practical solution. No matter which material you select for your residential roofing project, the most important factor is a quality installation. Proper technique is what ensures your new wood roof will be both beautiful and built to last for years to come.
Why Choose Wood Shingles for Your Home?
Choosing a new roof is a big decision that defines your home’s character. If you’re looking for timeless style, natural efficiency, and an eco-friendly option, wood shingles are an incredible choice. They are more than just a protective layer; they are an upgrade to your home’s entire aesthetic and performance. Let’s look at a few of the biggest reasons homeowners fall in love with wood roofing.
Add Instant Curb Appeal and Value
There’s a reason wood shingles have graced beautiful homes for centuries: they are simply stunning. The natural grain and rich tones in each shingle create a warm, textured look that synthetic materials can’t replicate. This unique character adds tremendous curb appeal, making your home stand out. It’s not just about looks, either. A high-quality wood roof is a smart investment that can increase your property’s value. We often work with cedar shake roofing, which develops a beautiful silvery-gray patina over time, adding rustic elegance that complements both traditional and contemporary architecture. It’s a classic choice that never goes out of style.
How Wood Shingles Can Lower Your Energy Bills
Did you know your roof can help you save on energy bills? Wood has a natural cellular structure that traps air, making it an excellent insulator. This means a wood shingle roof helps keep your home cooler in the summer and warmer in the winter, reducing the strain on your HVAC system. The U.S. Department of Energy highlights that proper insulation is key to an energy-efficient home, and wood provides this benefit naturally. Over the life of your roof, this can add up to significant savings and a more comfortable living space year-round. It’s a practical benefit that comes with a beautiful aesthetic.
The Eco-Friendly Advantage of Wood Shingles
For homeowners who prioritize sustainability, wood shingles are a fantastic choice. Unlike many other roofing materials, wood is a renewable resource when harvested from responsibly managed forests. This makes it a much greener option for your home. At the end of its long life, a wood roof is also biodegradable, meaning it can return to the earth instead of sitting in a landfill for centuries. By choosing wood, you’re not only getting a beautiful and durable roof but also making a decision that is kinder to the planet. It’s a way to protect your home and the environment at the same time.
Prepping for Your Wood Roof Installation
A successful project starts with great preparation. Before you even think about climbing a ladder, taking the time to gather all your tools and materials will make the installation process go so much smoother. Think of it as setting up your workspace for success. With everything organized and within reach, you can focus on the task at hand without any last-minute runs to the hardware store. This is a step you don’t want to rush, as it lays the groundwork for a quality, long-lasting roof.
Safety First: Handling Wood Dust and Materials
Before you start cutting, it’s crucial to talk about safety, specifically wood dust. When you cut or sand cedar shingles, the dust created isn’t just messy—it can be hazardous. According to the CDC, wood dust can irritate your skin and eyes, and inhaling it can cause respiratory issues. It’s also flammable, so you need to be mindful of sparks from power tools. Always wear a good-quality dust mask and safety glasses. It’s also a smart idea to work in a well-ventilated area and clean up dust frequently with a vacuum instead of a broom to keep it from becoming airborne. Taking these simple precautions protects your health and ensures a safe work environment from start to finish.
Proper Shingle Storage and Handling
Your wood shingles need a little care even before they make it to the roof. Proper storage is key to preventing warping or moisture damage. Keep the bundles flat, covered, and in a dry, well-ventilated spot. If you have to store them on a concrete floor, lay down a plastic sheet first and keep them on a pallet to prevent moisture from wicking up from the ground. Before you begin the installation, take the time to inspect each shingle. Check for any cracks, knots, or defects. It’s much easier to set aside a problematic shingle now than to replace it later. This quality check is a standard part of any professional roofing project and ensures only the best materials make it onto your home.
Your Essential Tool Checklist
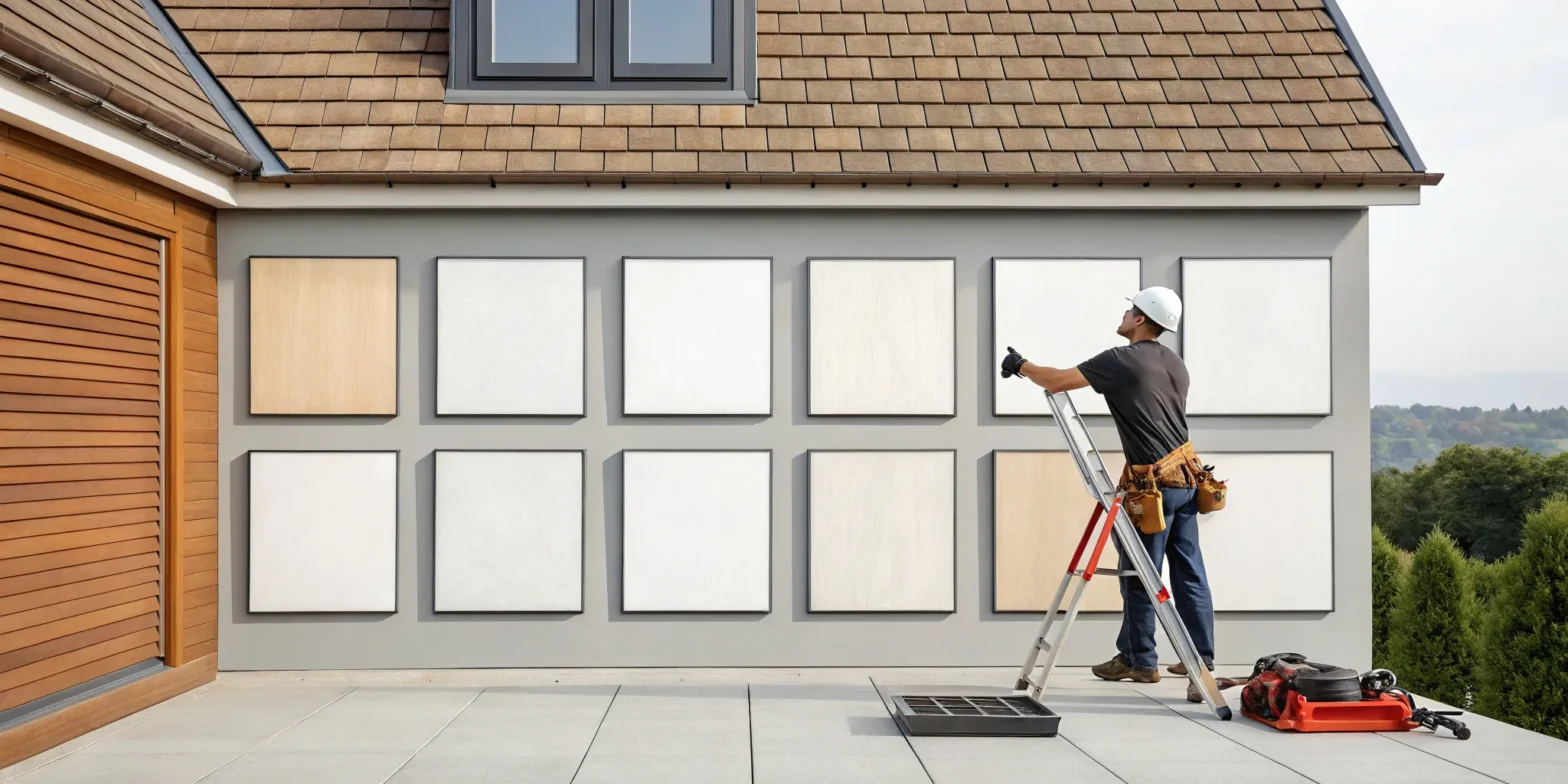
Having the right tools can make all the difference between a frustrating project and a satisfying one. You don’t need a massive workshop, just a few key items. A shingle rack, which you can build yourself, is incredibly helpful for holding shingles in place while you work. It acts like an extra set of hands, keeping everything organized on the roof. Another must-have is a story pole. This is simply a marked stick that helps you keep your shingle rows perfectly level and evenly spaced. It’s a simple tool that ensures your final result looks clean and professional. Getting the shingle installation right from the start depends on these basics.
Your Complete Materials Checklist
With your tools ready, it’s time to check your materials. First on the list is a breather material, like a nylon matrix, which goes over the underlayment. This is a crucial step that allows air to circulate behind the shingles, preventing moisture buildup that can lead to rot. Next, you’ll need a drip edge made of copper or another corrosion-resistant metal to guide water away from the roof’s edge and into the gutters. Of course, you also need your shingles. Make sure you have the correct grade and type for your home’s style and climate, as this choice impacts both the look and the long-term durability of your roof. Watching a video on how to install wood shingles can help you visualize how these materials come together.
How to Choose the Right Nails
This might seem like a small detail, but choosing the right nails is critical for a long-lasting wood shingle roof. Because of the natural acids in wood, you’ll want to use stainless steel or hot-dipped galvanized ring-shank nails to prevent rust and corrosion over time. The wrong nails can leave streaks on your beautiful shingles or fail completely. For placement, a good rule of thumb is to use two nails for any shingle up to 10 inches wide, placing them about 3/4 of an inch from each side. If you have wider shingles, add two more nails near the center to keep them secure. Following a proper Western Red Cedar shingle installation guide will ensure every shingle stays put for years to come.
Roof Prep for Your Wood Shingle Installation
A beautiful wood shingle roof doesn’t just appear out of thin air. The secret to a long-lasting, stunning result lies in the prep work. Think of it like painting a masterpiece; you need a clean, primed canvas before you even touch the brush. Rushing this stage can lead to problems down the road, from leaks to premature aging. Taking the time to properly prepare your roof deck ensures your new shingles have a solid, stable, and dry foundation to protect your home for decades.
This preparation involves more than just clearing off the old roof. You’ll need to create a complete system that works together to manage moisture and support the new wood shingles. We’ll walk through inspecting the underlying structure, installing critical protective layers, making sure your roof can breathe, and handling your new shingles with care before they even go on the roof. Each step is a crucial part of a successful residential roofing project. Getting these details right is what separates a good roof from a great one.
Start with a Clean and Inspected Roof Deck
Before any new material touches your roof, you need to give the roof deck a thorough check-up. The deck is the plywood or OSB sheathing that forms the foundation of your roof. It must be solid, clean, and dry. Start by sweeping away all debris, old nails, and dust. Then, carefully inspect the entire surface for any signs of damage, like soft spots, rot, or water stains. If you find any compromised areas, you’ll need to cut them out and replace them with new sheathing. Installing beautiful new shingles over a weak or rotten deck is a recipe for failure, so don’t skip this critical step.
How to Install Drip Edge and Underlayment
With a clean deck, your next step is to install the first lines of defense against water. Start with a metal drip edge along the eaves and rakes of the roof. This simple component helps direct water into the gutters and away from your fascia boards. Next, you’ll roll out the underlayment. In a climate like ours in the Puget Sound, it’s essential to use a self-adhering ice and water shield along the eaves. This ice barrier provides extra protection against ice dams that can form in colder weather. The rest of the roof deck gets covered with a high-quality roofing felt or synthetic underlayment.
Prepping Corners with a Waterproof Membrane
When it comes to a watertight roof, the corners are where your attention to detail really counts. These areas are naturally vulnerable to leaks, so giving them extra protection is a must. Your best friend here is a self-adhering waterproof membrane, often called an ice and water shield. You’ll want to apply this sticky tape to the corners of your roof deck, extending it about six inches in each direction to create a robust seal against moisture. This technique is a standard recommendation in professional guides, like the Cedar Shake & Shingle Bureau’s installation manual, because it ensures all intersections are properly protected. This simple step is your best defense against wind-driven rain, protecting your investment from water damage for years to come.
Why Roof Ventilation Is a Must (And How to Check It)
Proper ventilation is the key to a long life for any wood roof. Without good airflow, heat and moisture can get trapped in your attic, leading to mold, rot, and ice dams in the winter. Your goal is to create a system that allows cool, dry air to enter at the eaves (soffit vents) and warm, moist air to exit near the peak (ridge vents). The Cedar Shake & Shingle Bureau stresses that proper ventilation is non-negotiable for the longevity of cedar shingles. Ensuring your attic has a balanced intake and exhaust system will keep the roof deck dry and extend the life of your shingles significantly.
A Quick Pre-Installation Shingle Check
Your new wood shingles need a little care even before they’re installed. Keep them stored in a dry, covered, and well-ventilated area, and make sure they are lying flat and off the ground. Storing them on their original pallet is ideal. Just before you begin, open the bundles and inspect the shingles. Look for any defects like cracks or excessive knots. It’s also a good idea to mix shingles from different bundles to ensure a consistent color and grain pattern across the roof. Remember, once a shingle is installed, it’s considered accepted, so this pre-installation check is your final quality control measure.
The “Install It, You Own It” Rule
There’s a saying in the roofing trade: “Install it, you own it.” This simple phrase captures the immense responsibility that comes with placing each shingle. It means that once a shingle is nailed down, you are accepting both its quality and your own workmanship. This makes the installation process your final, real-time quality control check. As you work, pay close attention to staggering the joints between shingles by at least 1.5 inches from the row below—this is crucial for preventing water from finding a direct path through your roof. Equally important is nail placement. Each nail should be driven just right, so it’s completely covered by the next course of shingles. Following these meticulous steps, as detailed in professional guides, is what separates a good job from a great one and ensures you truly “own” the quality of your finished roof.
How to Install Wood Shingles: A Step-by-Step Guide
Alright, let’s get into the nuts and bolts of the installation. Putting on wood shingles is a project that demands precision, but seeing the finished product is incredibly rewarding. Each step builds on the last, creating a beautiful, weather-tight barrier for your home. Think of it as a large-scale puzzle where every piece has a specific place and purpose. As you work, remember that taking your time and focusing on the details is key to a roof that not only looks fantastic but also performs well for years. For complex projects or if you’re unsure at any point, remember that a professional installation guarantees every detail is handled correctly, which is especially important in our damp Puget Sound climate.
Laying the Starter Course at the Eaves
Your first course of shingles sets the foundation for the entire roof, so it’s a critical step. You’ll begin by installing a double layer along the eaves (the bottom edge of the roof). This starter course provides extra protection against water runoff and ice damming. To do this properly, let the shingles hang over the edge of the roofline by about one and a half inches and overhang the side rake edge by about three-quarters of an inch. This overhang helps guide water directly into the gutters, protecting the underlying roof deck and fascia boards from moisture.
Mastering Shingle Exposure and Spacing
As you lay your shingles, two measurements are crucial: exposure and spacing. The exposure is the part of the shingle visible once the next row is installed. To keep your rows consistent, snap a chalk line for each course. For spacing, you need to leave a small gap of about one-quarter of an inch between each shingle. This gap is essential because it allows the wood to expand and contract with changes in humidity without buckling. You also need to stagger the joints between shingles from one row to the next by at least one and a half inches. This offset pattern prevents water from finding a direct path to the underlayment.
Adjusting Gaps Based on Shingle Grade
It’s important to remember that not all wood shingles are created equal, and the grade you’re working with directly influences how you install them. When it comes to spacing, one size does not fit all. For instance, a high-quality ‘Number 1 Grade Cedar Shingle’ will require a gap of 1/8 to 1/4 inch between each piece. However, if you’re using ‘Number 1 Grade Western Red Cedar Shingles,’ you’ll need to adjust that spacing to be a bit wider, between 1/4 and 3/8 of an inch. According to the Western Red Cedar Shingle Installation Guide, this gap is essential to allow the wood to expand and contract with changes in humidity—a must for our damp climate. In addition to the side gaps, staggering the joints between shingles from one row to the next by at least 1 1/2 inches is critical. This offset not only creates a beautiful, woven look but also prevents water from finding a direct path to the underlayment, ensuring your roof remains watertight for years to come.
The Right Way to Nail Your Wood Shingles
How you nail your shingles is just as important as where you place them. Using the right technique ensures your roof can withstand wind and weather. As a general rule, use two rust-resistant nails for each shingle. Place the nails about three-quarters of an inch to one inch in from each side and far enough up from the butt end so they will be covered by the next course of shingles. According to the Cedar Shake & Shingle Bureau, it’s crucial not to overdrive the nails; they should be driven flush with the surface of the shingle without breaking the wood’s fibers.
Fastening Techniques for Speed and Durability
To work efficiently without sacrificing quality, focus on a consistent nailing pattern. For most shingles, the two-nail method is your best bet. Place one nail about an inch from each side of the shingle. The key is to position them high enough so the next course of shingles will cover the nail heads completely. This simple technique is what helps secure your roof against wind and rain, creating a tight, durable shield. Driving the nails to the right depth is also crucial—they should sit flush against the shingle. If they’re driven too deep, they can crack the wood, and if they’re left sticking up, they can interfere with the shingles in the next row.
How to Nail Wide Shingles and Seal Cut Edges
You’ll occasionally run into wider shingles or need to cut one to fit. These situations require a little extra attention. For any shingle wider than eight inches, add two more nails near the center, about an inch apart. This helps prevent the shingle from splitting as it naturally expands and contracts. If a split does occur, this technique ensures both pieces remain fastened. Similarly, whenever you cut a shingle, you expose raw wood that’s vulnerable to moisture. Before you install it, apply a coat of sealant to the cut edge. This small step is a pro move that prevents water from wicking into the wood, protecting it from rot. Just be careful to keep the sealant off the shingle’s face to maintain a clean look. These are the fine details that go into properly installing cedar shingles.
How to Keep Your Shingle Courses Straight
A straight, level installation is the mark of a job well done. To keep your courses perfectly aligned, use a chalk line or a straightedge as your guide. After you determine the correct exposure for your shingles (typically around five inches, but check the manufacturer’s recommendation), snap a horizontal line across the roof for each row. This gives you a clear guide to follow, preventing wavy or uneven lines that can detract from the roof’s appearance. Taking a moment to set this guide for each row ensures a professional, uniform look across the entire roof surface.
Using a Story Pole or Ledger Board
While a chalk line is a great start, for ultimate precision, many pros use a story pole or a ledger board to keep their work flawless. A story pole is a simple but brilliant tool—it’s just a straight board where you mark the exact height for each row of shingles. By transferring these marks as you work up the roof, you guarantee every course is perfectly level, which is especially helpful when dealing with the natural variations in wood shingle lengths. Another great trick is using a ledger board. This is a temporary straight board lightly nailed to the roof to act as a physical guide. You rest the shingles on it as you nail them, ensuring a perfectly straight line every time. These are the kinds of professional techniques that create the crisp, uniform finish that makes a wood roof look so impressive.
Cutting and Fitting Shingles Like a Pro
No roof is a perfect rectangle, and this is where the real artistry of shingle installation comes into play. Cutting and fitting shingles is all about tailoring the wood to the unique features of your roof, like valleys, hips, and the areas around chimneys or vents. It’s the step that transforms a pile of shingles into a seamless, custom-fit protective layer for your home. While it might sound like a job reserved only for seasoned experts, understanding a few key techniques can make the process much more approachable. It’s all about making clean, precise cuts that ensure every shingle fits snugly and looks great, contributing to a polished, professional finish.
Cutting with the Grain: Manual and Power Tools
When you’re working with wood, it’s important to understand its natural tendencies. Wood has a grain, and it will always want to split along that line. To avoid wasting material, you’ll want to cut with the grain in a way that directs any potential split into the scrap piece, not the shingle you plan to install. The good news is that cedar is a relatively soft wood, so you don’t always need heavy-duty power tools for a clean cut. For many cuts, a sharp utility knife and a square are all you need to get a precise line. For trimming thinner sections, a pair of tin snips works surprisingly well. Mastering these simple cutting techniques allows for greater control and a more professional finish.
Installing Shingles on Valleys, Hips, and Ridges
Valleys, ridges, and hips are areas where different roof planes meet, and they require special attention to prevent leaks. In valleys, you can install a woven pattern where you alternate shingles from each side, overlapping them to create a tight seal. For hips and ridges, you’ll use pre-cut or custom-fitted shingles that fold over the peak. Start at the bottom of a hip or one end of a ridge and work your way up or across, overlapping each piece. These areas are complex, and ensuring they are completely watertight is a top priority for a durable cedar shake roof.
Advanced Technique: Weaving Corners
For a truly seamless, handcrafted finish, weaving your corners is a beautiful technique to master. This traditional method involves interlacing the shingles from two adjoining walls, which creates a continuous flow of wood that is both stunning and highly weather-resistant. The key is to work on both sides of the corner simultaneously. You’ll start by letting a shingle from one wall hang over the corner, then carefully trim it back with a sharp utility knife. For an extra-clean edge, you can smooth the cut with a small hand plane. Next, lay a shingle from the opposite wall over the one you just trimmed and repeat the process. By alternating which side you start with on each row, you’ll achieve a lovely staggered pattern that looks incredibly professional. A critical tip: always cut with the grain to prevent the wood from splitting. Mastering the art of weaving corners not only adds significant curb appeal but also creates a robust, watertight seal that protects one of the most vulnerable parts of your roof.
Finishing the Job: How to Install the Ridge Cap
The ridge cap is the final piece of the puzzle, covering the very peak of your roof. These shingles are applied last, covering the top course of shingles on both sides of the roof. Each piece of the ridge cap should overlap the next, moving into the direction of the prevailing winds to prevent wind and rain from getting underneath. For the final piece, you can apply a bit of sealant under the shingle for extra protection before nailing it down. A properly finished ridge cap ensures the entire roof is sealed against the elements, giving it a clean, completed look.
Avoid These Common Wood Roof Installation Mistakes
Installing a wood shingle roof is a rewarding project, but it’s one where the details really matter. A small mistake during installation can lead to big problems down the road, like leaks, rot, or a shortened lifespan for your beautiful new roof. Getting it right from the start saves you from costly repairs and ensures your home stays protected and looks its best. Let’s walk through some of the most common installation pitfalls and how you can steer clear of them. By paying close attention to these key areas, you can build a roof that’s not just attractive, but also durable and weather-tight for years to come.
Avoiding Incorrect Nail Placement and Over-Driving
Proper nailing is more than just fastening a shingle to the roof; it’s what holds your entire roofing system together against wind and weather. A frequent mistake is over-driving the nails, which means hammering them in too deep. This can crack the shingle or create a weak spot that allows water to seep in. On the flip side, under-driven nails that aren’t flush with the shingle can snag on other shingles, block proper water runoff, and work themselves loose over time. The goal is to drive the nail until the head is perfectly flush with the surface of the shingle, providing a secure hold without damaging the wood.
Why You Must Stagger Shingle Joints
Think of installing shingles like laying bricks: you would never line up all the vertical gaps. The same principle is essential for a watertight roof. The small gaps between individual shingles in a row are called joints. If the joints in one row line up with the joints in the row below it, you’re creating a direct path for water to get through to the underlayment. To prevent this, you must stagger the joints. A good rule of thumb is to make sure the gap in one row is offset by at least 1.5 inches from the gap in the row below it. This simple step is critical for the roof’s structural integrity and water resistance.
The Three-Course Staggering Rule
To take this principle a step further, professionals use what’s known as the three-course staggering rule. This guideline simply means that the joints in any given row must not align with the joints in the two courses directly below it. This creates a much stronger, more interwoven pattern that eliminates any potential weak points where water could find a path through the roofing system. Following strict installation guidelines like this is especially important in climates with wind-driven rain, like we often see in the Puget Sound. It’s a detail that separates a standard job from a truly professional one, ensuring your roof is as durable as it is beautiful.
The Risk of Skipping Ventilation and Moisture Barriers
Wood is a natural material that needs to breathe, and your roof is no exception. One of the most damaging mistakes is failing to account for proper ventilation. Trapping moisture between the shingles and the roof deck can lead to rot, mold, and premature decay, causing the wood to fail from the inside out. A well-designed residential roofing system includes an air gap that allows for continuous airflow, keeping the shingles dry. This is why simply slapping a waterproof membrane under the shingles without a ventilation strategy can do more harm than good. Proper ventilation is a key part of a healthy, long-lasting roof.
Why You Shouldn’t Install Shingles in Bad Weather
Living in the Puget Sound, we know a thing or two about rain. It’s tempting to push through a project, but installing wood shingles in wet weather is a recipe for trouble. Wood absorbs moisture, and if you install damp shingles, they can swell and then shrink as they dry on the roof, leading to cracking and buckling. Even how you store your materials matters. Always keep your shingles off the ground and covered to protect them from moisture before installation begins. Beyond the materials, working on a wet, slippery roof is a major safety hazard. It’s always best to wait for a clear, dry day to work.
Always Inspect Your Shingles Before Installing
The time to catch a defective shingle is before it’s nailed to your roof. Take a moment to inspect your shingles as you pull them from the bundle. Look for any obvious defects like large cracks, splits, or significant warping. Installing a damaged shingle compromises the integrity of that spot on your roof and can be difficult to fix later. Remember, once a shingle is installed, it’s much harder to hold a supplier accountable for material defects. This quality control step is a standard part of any professional installation and a crucial habit for any DIYer to adopt. It ensures only the best materials make it onto your home.
How to Maintain Your New Wood Shingle Roof
You’ve put in the work to install a beautiful wood shingle roof, and now it’s time to protect that investment. With the right care, your roof will not only look fantastic for years to come but will also continue to shield your home effectively. Proper maintenance isn’t about complicated, time-consuming tasks; it’s about consistent, simple habits that make a huge difference in the long run. Regular inspections, keeping the surface clean, and addressing small issues before they grow are the keys to a long-lasting roof.
Think of it as routine care that prevents major headaches down the road. In the Pacific Northwest, where moisture is a constant companion, staying on top of your roof’s health is especially important. A well-maintained wood roof can handle our damp climate beautifully, developing a distinguished silver-gray patina over time without compromising its strength. Neglect, on the other hand, can lead to moss, rot, and leaks. The following steps will guide you through everything you need to know to keep your cedar shake shingles in top condition, ensuring they remain a durable and attractive feature of your home for decades.
How to Inspect and Clean Your Wood Roof
Making a habit of inspecting your roof a couple of times a year, especially after major storms, can save you a lot of trouble. You don’t need to get on the roof; a pair of binoculars from the ground works perfectly. Look for any shingles that are cracked, split, warped, or missing. Also, keep an eye out for moss or algae growth and any buildup of leaves or pine needles, particularly in the roof valleys. When it comes to cleaning, be gentle. A leaf blower or a soft-bristle broom can clear away debris without harming the wood. Avoid using a pressure washer, as the high-powered stream can strip the wood’s natural protective fibers and force water underneath the shingles.
Keep Tree Branches Trimmed and Away from Your Roof
Those beautiful trees around your home can be a hidden threat to your wood roof. Overhanging branches can scrape against the shingles during windy weather, causing physical damage over time. They also drop leaves, needles, and sap, which can trap moisture against the roof surface and create a perfect environment for moss and rot to develop. By trimming back any branches that are too close to or touching your roof, you allow for better airflow and more sunlight. This helps your roof dry out completely after our frequent Puget Sound rain, which is one of the best things you can do to prevent decay. For larger trees, it’s always safest to call a professional arborist for help.
Should You Apply Protective Coatings and Treatments?
While wood shingles have natural oils that help them resist decay, applying a protective treatment every few years can significantly extend their lifespan. These treatments are designed to protect the wood from harsh UV rays and moisture, and many also contain fungicides to prevent moss and algae growth. It’s important to choose a product specifically made for wood roofs and to follow the application instructions carefully. Applying the wrong type of sealant or coating can sometimes trap moisture inside the wood, which does more harm than good. If you’re considering a treatment, it’s a great idea to consult with a residential roofing professional to ensure you’re using the right product for your specific roof and climate.
Know When to Repair vs. Replace
Catching problems early is the difference between a simple repair and a full-scale replacement. If you spot a few cracked, loose, or missing shingles during your inspection, it’s usually a straightforward fix. A professional can easily replace individual shingles to maintain your roof’s integrity. However, if you notice widespread issues like extensive curling, cupping, or rotting across large sections of the roof, it might be time to consider a replacement. Another sign is if your roof is simply reaching the end of its expected lifespan. If you’re unsure about the extent of the damage, a professional inspection will give you a clear picture of your roof’s health and help you estimate the cost of a new roof.
DIY vs. Pro Installation: Is It Worth Hiring an Expert?
Deciding to install a new wood shingle roof is a big step, and it’s natural to wonder if you can tackle the job yourself. The satisfaction of a DIY project is hard to beat, and the potential cost savings can be tempting. But when it comes to something as critical as your home’s roof, it’s important to weigh the benefits against the risks. Before you head to the hardware store, let’s walk through what it really takes to install wood shingles and help you decide if hiring a professional is the better path for you.
The biggest factor is your personal skill level. If you have solid experience with roofing and carpentry, you might feel ready for the challenge. For everyone else, the learning curve can be steep, and small mistakes can lead to big problems like leaks or rot. An experienced roofer not only has the right skills but also the efficiency that comes from doing this work every day. They can often spot underlying issues a novice might miss, ensuring a more durable installation that protects your home for years to come.
Next, consider the time commitment. A roofing project isn’t a simple weekend task; it can take a significant amount of time, especially if you’re learning as you go. You’ll need to factor in everything from tearing off the old roof to cleaning up the site. Professionals work as a team to get the job done quickly and minimize disruption to your life. While DIY can save on labor costs, you also have to account for the price of tools, materials, and any potential mistakes that might require hiring an expert to fix later.
Finally, hiring a professional team like Landmark Roofing & Siding provides security that DIY can’t match. Reputable contractors are licensed, insured, and offer warranties on their work. This means if something goes wrong with the installation, you’re covered. That peace of mind is often worth the investment, giving you confidence that your beautiful new wood shingle roof is built to last.
Considerations for Puget Sound Weather and Codes
Here in the Puget Sound, our weather is the ultimate test for any roof. The persistent drizzle and high humidity create a challenging environment where moss, algae, and rot can thrive if a roof isn’t installed with absolute precision. A successful wood roof in our climate depends on a complete system designed to manage moisture, including robust underlayment, proper ventilation, and meticulous flashing. On top of the weather, each city has its own set of building codes that dictate specific installation requirements. A professional team that handles residential roofing in this area stays current with these local regulations, ensuring your project is compliant from the start and passes inspection without any costly rework. This knowledge is critical for a safe and durable roof that meets all state building codes.
Why Experience with Cedar Matters
Working with cedar is a true craft, and it’s one that requires a specific touch that only comes with experience. Unlike uniform, manufactured shingles, each piece of cedar has its own unique character. An experienced installer knows how to read the grain, blend shingles from different bundles for a consistent look, and make precise cuts that fit perfectly around vents and valleys. They understand the nuances of proper nailing to avoid splitting the wood and the importance of leaving the right expansion gap between shingles to prevent buckling as the wood responds to our humid climate. This attention to detail is what separates a beautiful, long-lasting roof from one that fails prematurely. It’s a skill honed over many projects, ensuring every shingle contributes to a strong, watertight, and stunning final product.
Related Articles
- The Essential Cedar Shingles Installation Guide – Landmark Roofing & Siding
- Wood Shingle Roof: Shakes vs. Shingles Explained – Landmark Roofing & Siding
Frequently Asked Questions
How long can I expect a wood shingle roof to last? With proper installation and consistent care, a high-quality cedar shingle roof can last 30 years or even longer. The key is maintenance. Regularly clearing debris, trimming overhanging trees, and ensuring good ventilation will help you get the most life out of your investment. Neglecting these simple steps can significantly shorten its lifespan, especially in a damp climate like ours.
Are wood shingles a serious fire risk? This is a common and very valid concern. While untreated wood is flammable, modern wood shingles can be pressure-treated with fire retardants to achieve a Class A fire rating. This is the highest rating for fire resistance, putting them on par with materials like asphalt shingles or metal. If fire safety is a top priority for you, make sure you specify that you want fire-retardant treated shingles for your project.
How much more maintenance does a wood roof need compared to an asphalt one? A wood roof definitely requires more hands-on attention than an asphalt roof. While you can largely ignore an asphalt roof between inspections, a wood roof thrives on regular care. This means keeping it clean of leaves and pine needles, watching for any moss growth, and making sure tree limbs don’t hang over it. Think of it as tending to a garden; the consistent effort is what keeps it beautiful and healthy for the long haul.
Can I save money by installing wood shingles over my old asphalt roof? I would strongly advise against this. Installing a new roof over an old one is a bad idea for a few reasons. First, you can’t inspect the underlying roof deck for rot or damage, which is a critical step. Second, the extra weight can strain your home’s structure. Most importantly for wood, shingles need to breathe. Placing them directly on top of an old roof traps moisture and prevents airflow, which will cause the new wood to rot prematurely.
My house is in a shady spot. Is a wood roof still a good choice? You can absolutely have a beautiful wood roof on a shady property, but your maintenance routine becomes even more important. Shade often means more moisture and less opportunity for the roof to dry out, which is the perfect recipe for moss and algae. To counteract this, you must be diligent about keeping the roof clear of debris, ensuring your attic has excellent ventilation, and trimming trees to allow as much air and light as possible.